The Best Jewish Brisket Recipe for Any Holiday
 Updated: Sep. 05, 2023
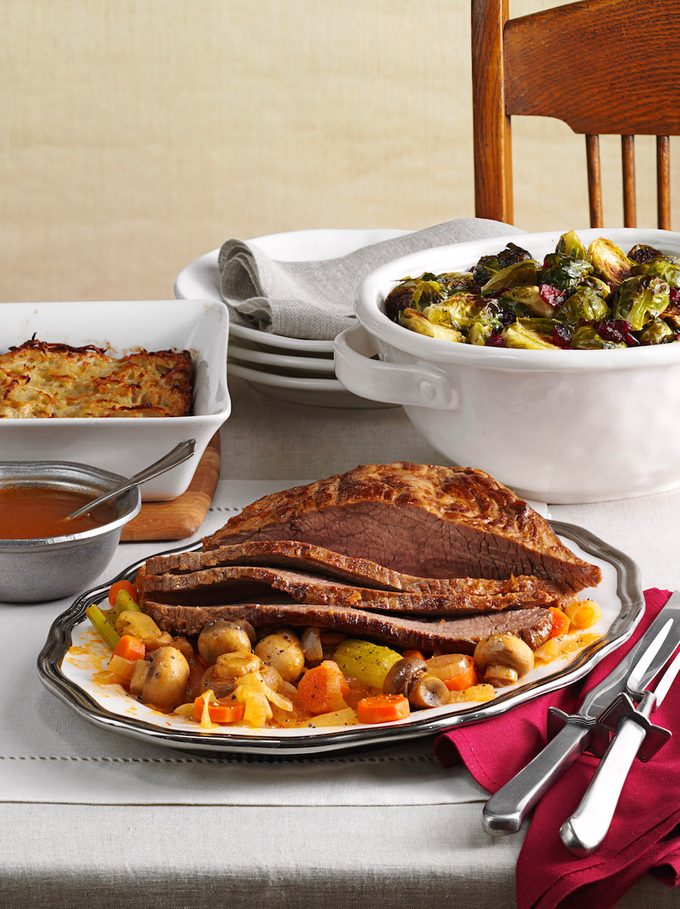
This Jewish brisket recipe is our go-to recipe for the holidays. Use our expert tips to create a perfectly moist, tender brisket.
Our editors and experts handpick every product we feature. We may earn a commission from your purchases.
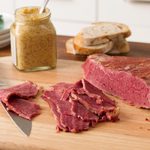
Most of us are familiar with brisket in its smoked or cured forms: corned beef, pastrami and Texas-style barbecue brisket. But Jewish brisket—a braised version of brisket—can’t be beat.
It became a staple at Jewish holidays like Passover, Rosh Hashanah and Hanukkah because it’s a kosher cut of meat that can feed many. But you don’t have to be Jewish or celebrating a holiday to enjoy Jewish brisket. It’s perfect for any dinner party or even a Sunday supper.
We teamed up with Ellen Ruzinsky, who sent us this perfectly juicy and tender brisket recipe. Pour a glass of kosher wine, then follow along for tips and tricks to make the best brisket dinner.
On This Page
How to Choose a Brisket
Traditionally, brisket is an inexpensive cut of meat. It can turn out tough if cooked incorrectly because it comes from a well-worked muscle in the cow. But it contains a lot of fat that, combined with low-and-slow cooking techniques, can transform the tough meat into a tender, juicy, melt-in-your-mouth eating experience.
When picking a brisket, it’s all about the marbling—long streaks of white fat within the lean sections of the meat. As the brisket cooks, this intramuscular fat will melt and keep the lean meat juicy. In the end, the more marbling, the more flavorful and tender the brisket.
That said, we like the flat cut—the leaner part of the brisket. It still has plenty of intramuscular fat to keep the meat juicy, and it looks more appealing than the fatty point cut. As a bonus, it’s easier to slice, so it’s a win-win.
How Much Brisket Do You Need?
In general, plan for 1/2 pound of uncooked brisket per person. That means a five-pound brisket would feed about 10 people. It’s not a bad idea to add an extra pound or two, just in case your guests come extra hungry. The leftovers freeze exceptionally well, so don’t worry about cooking too much.
Tips for Making a Tender, Delicious Brisket
Brisket has a reputation for being hard to cook, for a good reason. If you cook it too quickly or at too high temperatures, the tough meat will seize up and never become tender. The good news: With a little practice, brisket is an easy cut of meat to master.
- Brown the meat on both sides: Flipping a five-pound hunk of meat can be intimidating, but you really cannot skip this step. Browning the meat on both sides goes a long way to enhance the flavor of your brisket, adding a caramelized flavor to both the meat and the sauce.
- Simmer, don’t boil: This recipe uses a braising technique to cook a large cut of meat in a small amount of liquid. We’ll use just enough liquid to come about halfway up the brisket, and it’s very important not to let that liquid boil. Boiling will not only cook the meat too quickly, turning it tough instead of tender, but also cause the liquid to evaporate.
- Make it ahead of time: If you have time, make your brisket a day or two ahead. It not only makes things less stressful, but cold brisket is much easier to slice. Cooling it down whole allows the juices to stay inside the meat as the brisket rests overnight, and the flavors will continue to develop in the refrigerator. This brisket gets better over time!
Tools You’ll Need
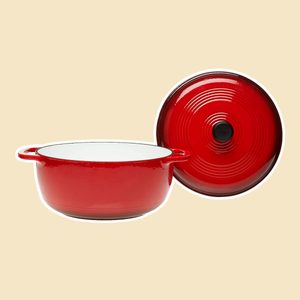

Dutch Oven: For starters, you need a vessel for cooking your brisket. This recipe doesn’t use a lot of liquid, so you don’t want any of it to escape while the brisket cooks. We recommend using a Dutch oven, which comes with a tight-fitting lid. We love these Lodge Dutch ovens for their budget-friendly price. Alternatively, if you have a stovetop-safe roasting pan, you could use that instead. Just make sure to seal it firmly with aluminum foil.
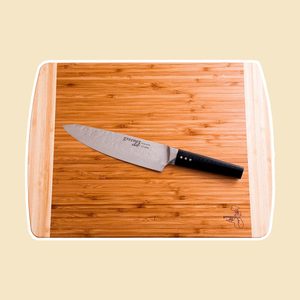
Cutting Board: Now is a really good time to invest in a large, heavy-duty bamboo cutting board. The grooves will catch any meat juices as you slice, so you can add them back to the sauce. We like bamboo because it’s a sustainable choice, and it’s resistant to bacteria.
Glass Baking Dish: We recommend resting the brisket overnight before reheating and serving. Since you should cool the brisket whole, we like using this 13×9-in. Pyrex casserole dish. It comes with a lid so you can cover it overnight, and you can reheat the brisket in the same dish.
How to Make Brisket
Ingredients
- 2 tablespoons canola oil
- 1 fresh beef brisket (4 to 5 pounds)
- 3 celery ribs, cut into 1-inch pieces
- 3 large carrots, cut into 1/4-inch slices
- 2 large onions, sliced
- 1 pound medium-sized mushrooms
- 3/4 cup cold water
- 3/4 cup tomato sauce
- 3 tablespoons Worcestershire sauce (choose a kosher brand for Passover)
- 1 tablespoon prepared horseradish
This brisket recipe makes about 12 servings.
Directions
Step 1: Brown the brisket
In a Dutch oven or an oven-safe roasting pan, heat the oil over medium-high heat. Add the brisket and cook for 8 to 10 minutes, until the bottom is deeply browned and caramelized. Flip the brisket and cook the other side for an additional 8 to 10 minutes, until it’s also browned. Remove the brisket from the pan and set aside.
Editor’s Tip: If the brisket is too heavy to lift with a single set of tongs, use a spatula to help you lift the other side.
Step 2: Add the remaining ingredients
Add the celery, carrots and onions to the pan and cook them until they’re crisp-tender, about 4 to 6 minutes. Add the brisket back to the pan, fat side up, along with the mushrooms, water, tomato sauce, Worcestershire sauce and horseradish.
Step 3: Simmer for hours
Bring the mixture to a boil before reducing the heat to a simmer. Cook, covered, for 2-1/2 to 3 hours, until the meat is tender.
Editor’s Tip: You can braise the brisket in a 275°F oven, if you prefer. It’s an easy way to maintain a steady simmer without fiddling with the knobs on the stovetop. Whether you’re cooking on the stovetop or in the oven, turn the brisket halfway through the cooking time if the brisket is thicker on one end than the other.
Step 4: Prepare the sauce
When the brisket is completely tender, remove the beef and vegetables from the pan and set aside. Skim the fat from the pan juices. If desired, you can thicken the juices using kosher-friendly potato starch. Place the strained, skimmed juices in a small saucepan over medium-high heat. Use 1 tablespoon potato starch per cup of sauce, mixed with 1/4 cup water to create a slurry. Simmer the slurry in the juices for 2 to 3 minutes, until sufficiently thickened.
Editor’s Tip: It’s easier to remove the fat from the sauce after it’s cooled. At this step, you can cool down the brisket, vegetables and sauce in the refrigerator overnight. The next morning, use a spoon to scrape away the fat and reheat the brisket following the directions below.
Step 5: Slice
Find the grain in the brisket by looking for the fibers that run parallel to each other. Position your knife in a “T” to the grain and cut the brisket into thin slices. Serve the sliced brisket with the vegetables and pan sauce.
How to Carve Brisket
This step is really important. Brisket has a ton of muscle fibers that run parallel to each other. That’s the “grain.” If you cut with the grain, you’d end up with long strands of fiber that are tough and chewy, even if you cook the brisket perfectly. When you position your knife at a “T” with the grain and make perpendicular slices, you’ll shorten each muscle fiber to the length of the slice. These shorter fibers are easier to chew, and thus more tender.
How to Reheat Brisket
If you’re serving the brisket the next day, you’ll want to cool it down whole in its juices. The next day, remove the pan from the refrigerator and let it come up to room temp. This is especially important if you’re reheating the brisket in the glass casserole dish you used to store it in the fridge.
Preheat the oven to 250°. Slice the brisket into thin slices against the grain and place them in a casserole dish, along with the vegetables. Spoon the sauce in between the slices and cover the pan tightly with aluminum foil. Heat the brisket until it’s warmed through, about 60 to 90 minutes.
If you prefer, reheat the brisket in a slow cooker on high for about 60 minutes.
What to Serve with Brisket
This brisket is a perfect main dish for any Jewish holiday, including Passover, Rosh Hashanah and Hanukkah. In general, brisket goes well with potatoes, root vegetables or grains like barley, but be sure to use kosher ingredients (like kosher Worcestershire sauce) and avoid adding any dairy.


- For Passover: Since the recipe already has carrots, you don’t need to make a traditional carrot side dish. You can serve this brisket with a potato kugel and a green vegetable, like broccoli, green beans or Brussels sprouts. Don’t forget to start the meal with matzo ball soup!
- For Rosh Hashanah: Brisket pairs perfectly with tzimmes, a root vegetable dish that includes sweet, dried fruit. Check out this guide to traditional Rosh Hashanah foods for additional side dish ideas.
- For Hanukkah: Serve with potato latkes or challah, along with a few great vegetable side dishes.
Tips for Storage
Once you slice the brisket, store it in an airtight container along with the sauce to keep it from drying out. You can also freeze the sliced brisket in its sauce airtight freezer bags. Brisket lasts for 3 to 4 days in the fridge and about 2 to 3 months in the freezer.
Next, check out these Jewish cookbooks for more traditional recipes.