ⓘ
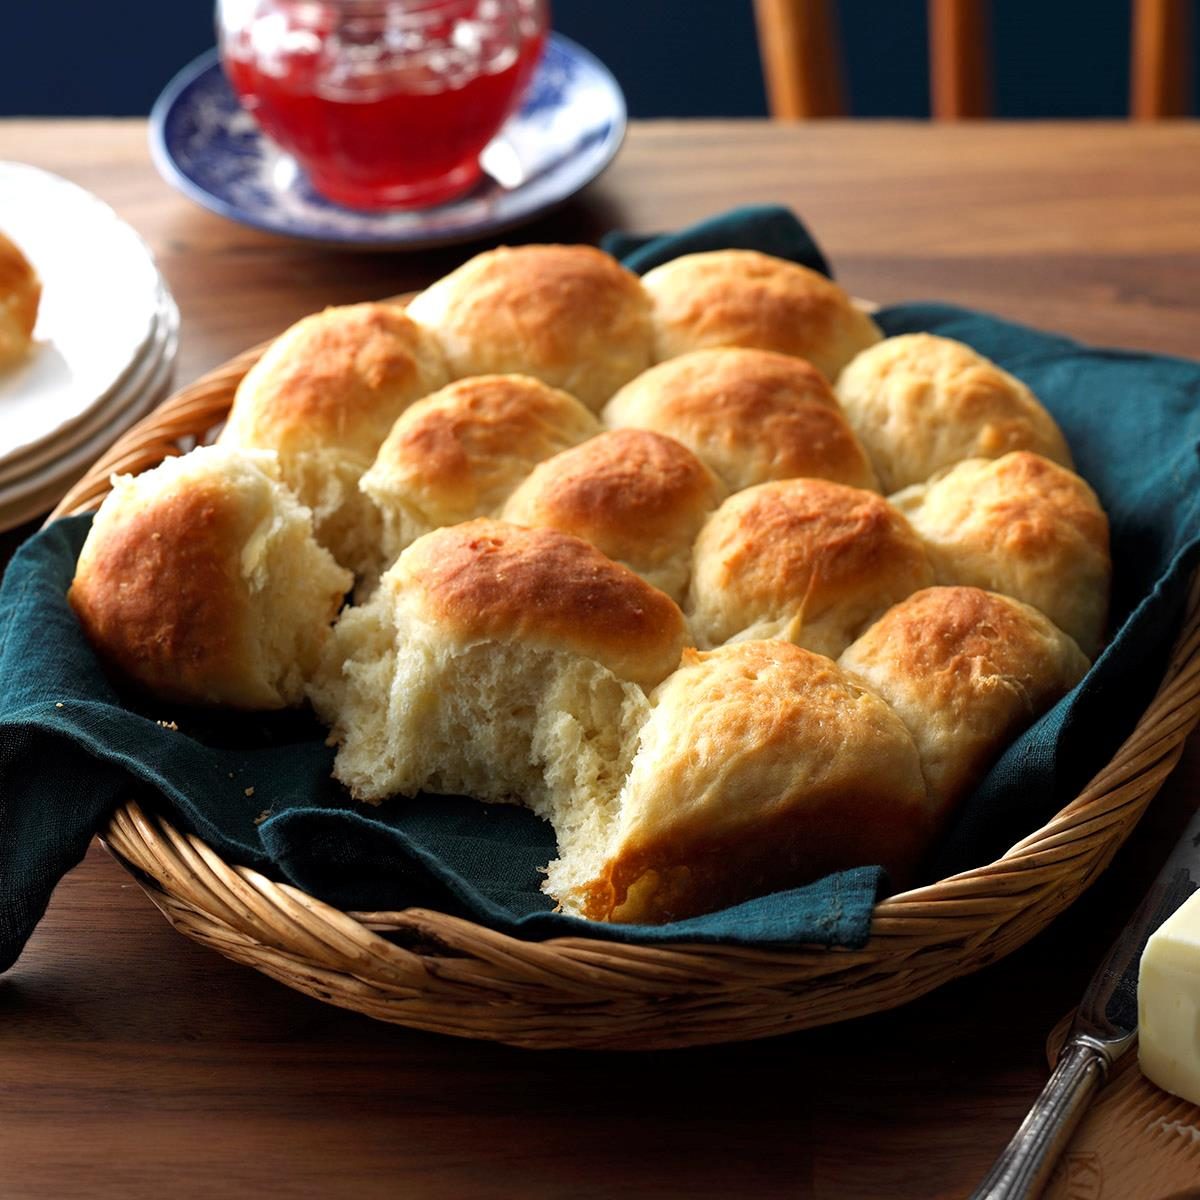
If you haven’t learned how to make crescent rolls yet because you’re afraid of using yeast or think you don’t have the time, you’re in for a treat. These small, delicate beauties melt in your mouth with a buttery taste and soft texture that can’t be beat. With five easy steps and a make-ahead freezer option, you can have amazing homemade crescent rolls on your table on a regular basis. (But don’t worry, we still have plenty of delicious ideas for refrigerated crescent dough!)
 Love to bake? Subscribe to the Bakeable newsletter and join our baking community on Facebook where you’ll find recipes, tips and challenges.
How to Make Crescent Rolls from Scratch
Our Test Kitchen’s favorite crescent roll recipe is this one right here. To make it, you’ll need:
- 3-3/4 – 4-1/4 cups all-purpose flour
- 2 packets (1/4 ounce each) active dry yeast
- 1 teaspoon salt
- 1 cup whole milk
- 1/2 cup butter, cubed
- 1/4 cup honey
- 3 egg yolks
- 2 tablespoons butter, melted
Step 1: Mix the ingredients
 Taste of Home
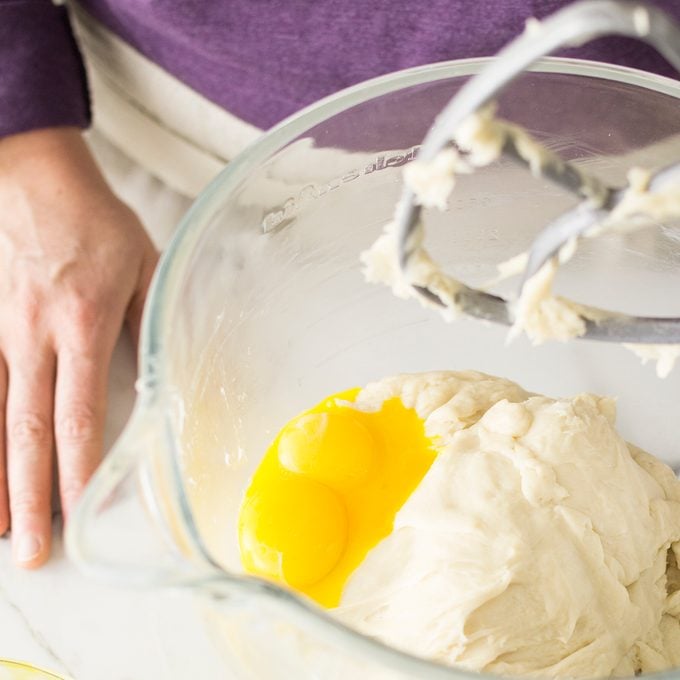
First, whisk together your dry ingredients—a cup and a half of flour, yeast and salt—together in a large mixing bowl. Then in a small saucepan, heat the milk, cubed butter and honey to about 120ºF (you don’t want it much hotter or you’ll kill the yeast). Add the milk mix to the dry ingredients and beat at medium speed—either with a hand mixer or stand mixer—for two minutes.
Next, add in the egg yolks and beat on high for another two minutes. Stir in enough of the remaining dough to form a soft, sticky dough.
Step 2: Knead the dough
 Taste of Home
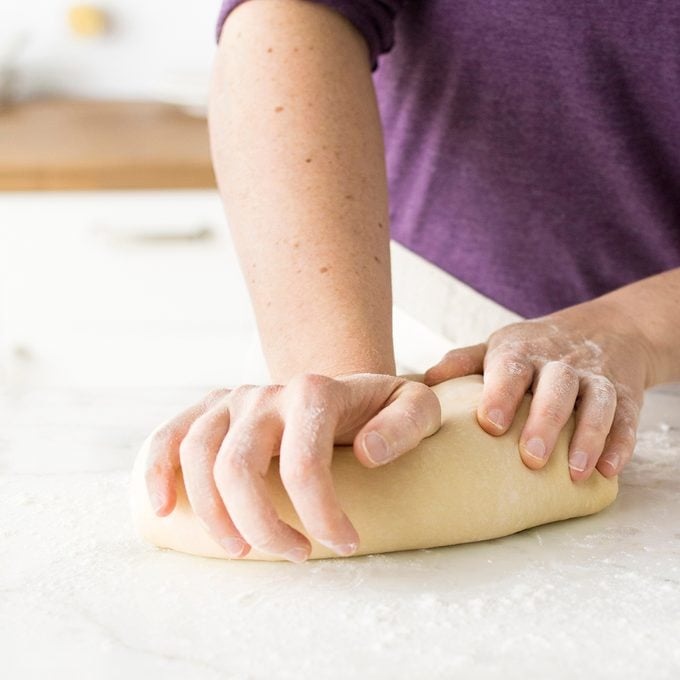
Now for the fun part: kneading! Turn your dough onto a lightly floured surface and flour your hands as well. Knead the dough by pushing the dough forward with the heel of your hand and then folding it over itself. Turn a quarter turn and repeat. Knead the dough until it’s smooth and elastic—about six to eight minutes.
Editor’s tip: As you knead the dough on a lightly floured surface, the dough will pick up a little more flour and should eventually feel smooth and satiny. If the dough is not sticking to your hands or the kneading surface, don’t add any more flour.
Step 3: Proof
Once you’re satisfied with your kneading, place the dough in a lightly greased bowl (a spritz of cooking spray works just fine). Cover the dough with plastic wrap or a tea towel and let it rise in a warm room (ideally 75-85ºF) until it doubles in size—about 45 minutes.
If your house is a bit cool or drafty, don’t worry. We’ve got tips on how to proof bread even in a chilly house.
Step 4: Punch down and refrigerate (or skip to step 5)
After the bread has doubled in size, punch down the dough. If you’re new to bread making, that just means that you push down the dough a bit with your knuckles to deflate it.
If you’re not ready to bake, you can pop the dough in a zip-top bag and refrigerate overnight. If you want to bake right away, skip right to step five.
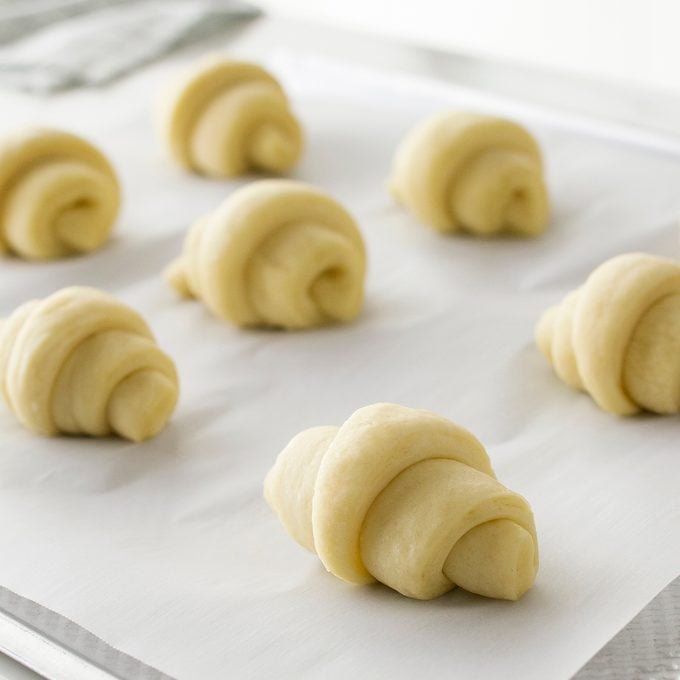
Step 5: Shape the crescents and proof again
 Taste of Home
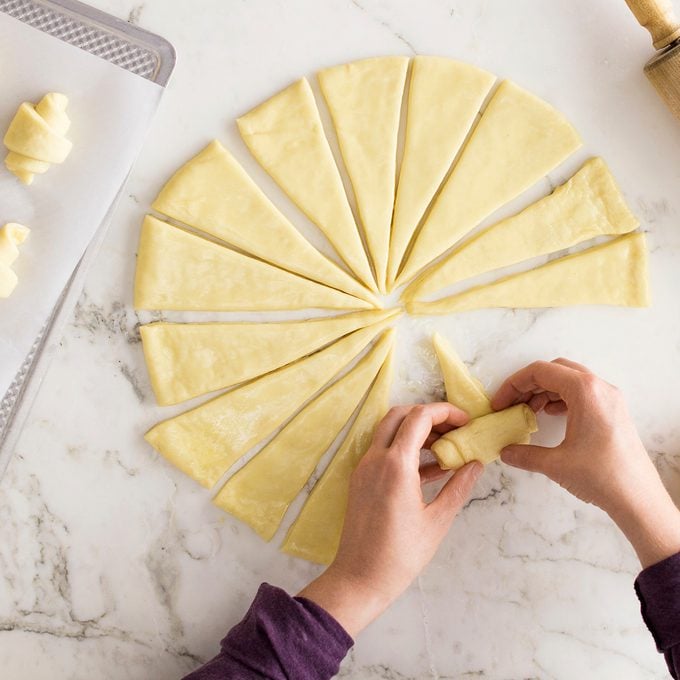
Turn the dough onto a lightly floured surface and divide it in half. Roll each portion into a 14-inch circle. Cut each circle into 16 wedges. Lightly brush the wedges with melted butter. Roll up from the wide ends, pinching the pointed ends to seal. Place the rolls two inches apart on parchment paper-lined baking sheets, point side down.
Cover with lightly greased plastic wrap and let the rolls rise in a warm place until doubled, about 45 minutes.
Editor’s tip: If you want to prep these crescent rolls far in advance, you can freeze them after shaping them (but before the second proof). To freeze, pop the shaped crescents on a cookie sheet in the freezer and chill until firm. Then transfer to a zip-top bag or airtight container and freeze for up to four weeks. When you’re ready to bake, defrost and let rise. This should take two to three hours.
Step 6: Bake and serve
 Taste of Home
Preheat the oven to 375°. Bake the rolls until golden brown, about ten minutes. Remove the rolls from pans to wire racks to cool slightly. Serve warm.
Get Creative with Your Crescent Rolls
 Photo: Taste of Home
These crescent rolls taste perfect as is, but if you’d like extra flavor, try adding your favorite herbs, fruit or nuts to the dough (or slather on homemade flavored butter instead). These are some of our favorite combinations.
- Chive crescent rolls: Divide two-thirds cup of minced, fresh chives between two discs of dough.
- Orange-pecan crescent rolls: Toss a cup of finely chopped pecans with a third cup sugar and four teaspoons grated orange peel. Divide the mixture between two circles of dough.
- Cranberry-thyme crescent rolls: Toss a cup of finely chopped dried cranberries with two-thirds cup of finely chopped walnuts and two teaspoons of minced fresh thyme leaves. Divide the mixture between two circles.
Editor’s tip: To make the flavor variations, brush the dough with butter and the filling of your choice before cutting it into wedges. Then cut, roll and bake as directed.
Now that you've mastered crescent rolls, try these.
Easy Potato Rolls
After I discovered this recipe, it became a mainstay for me. I make the dough ahead of time when company is coming, and I try to keep some in the refrigerator to bake for our ranch hands. Leftover mashed potatoes are almost sure to go into these rolls. —Jeanette McKinney, Belleview, Missouri
Go to Recipe
Icebox RollsI remember my mom making these rolls almost every Saturday so they'd be ready to bake on Sunday for company or someone just dropping by. Although they take a little time to prepare, they're really not all that difficult to make. And there's nothing in the stores that can compare to them! —Jean Fox, Welch, Minnesota
Parker House RollsMom is especially well known for the delectable things she bakes, like these tender Parker house rolls. When that basket comes around the table, we all automatically take two—one is just never enough. —Sandra Melnychenko, Grandview, Manitoba
Tender Whole Wheat RollsEven though these are whole wheat rolls they have a light texture and are soft and tender. This recipe reminds me of lots of happy meals with my family.—Wilma Orlano, Carroll, Iowa
Chive Pinwheel RollsThese light, pleasant-tasting rolls complement almost any entree. With the chive filling swirled through the golden bread, they're attractive enough for special occasions. —Ann Niemela, Ely, Minnesota
No-Fuss RollsWith only 4 ingredients, these delicious rolls are ready in no time. They're fantastic with herb butter or jam. —Glenda Trail, Manchester, Tennessee
Crescent Dinner RollsThese light, golden rolls have a heavenly homemade flavor and aroma. Mom never hesitates to whip up a batch of these from-scratch rolls, since they're a delightful way to round out a meal. —Debra Falkiner, St. Charles, Missouri
Oatmeal RollsMost people tell me what they like best about these rolls is they're so moist. I like them because they're simple to make, freeze well and because I grew up on oatmeal and still love it! —Jeanette Fuehring, Concordia, Missouri
Honey-Squash Dinner RollsPuffy dinner rolls take on rich color when you add squash to the dough. Any squash variety works—I've even used cooked carrots. —Marcia Whitney, Gainesville, Florida
Calzone RollsBig pizza flavor comes through in these rolls. My recipe makes two pans because you'll need 'em! It’s so easy to make the dough in my bread machine. —Barb Downie, Peterborough, Ontario
Honey Whole Wheat RollsMost of the farmers in our area grow wheat, so this recipe definitely represents my region. I bake these rolls often, especially when I'm making soup or stew. —Celecia Stoup, Hobart, Oklahoma
Dilly RollsThese versatile rolls are so welcome served warm alongside any dinner. I always make a big batch since my family enjoys them after they're cool, too, stuffed with a filling like egg salad or ham salad. —Mary Bickel, Terre Haute, Indiana
Flaky Butterhorn RollsThe recipe for these dinner rolls, slightly sweet and so very flaky, was my mother’s. They are simple to prepare because kneading skills are not required and the dough is easy to handle. My grandchildren have renamed them "Grandma’s croissants"! —Bernice Smith, Sturgeon Lake, Minnesota
Icebox Potato RollsThese tender rolls are a family favorite, and we sometimes have more than 20 people around the table. Make the dough in advance and bake when you're ready. —Barb Linnerud, Boiling Springs, South Carolina
Yogurt Yeast RollsPeople tend to snap up these fluffy, golden rolls, in a hurry whenever I take them to a potluck. It's a nice contribution since rolls are easy to transport, and one batch goes a long way. — Carol Forcum, Marion, Illinois
Butternut Squash Dinner RollsThese wholesome rolls are a pleasant addition to any entree. I get so many requests for them at holiday time. I make about 100 dozen in December! —Ula Kessler, Liberty Center, Ohio
Sour Cream Fan RollsI received this recipe from an email pen pal in Canada. The dough is so easy to work with, and it makes the lightest yeast rolls. I haven't used another white bread recipe since I started making this one.
-Carrie Ormsby, West Jordan, Utah
Cornmeal RollsGolden and buttery, these rolls have cornmeal flavor and a texture that goes perfectly with a hearty bowl of chili. —Carol Forcum, Marion, Illinois
Grandma's Rosemary Dinner RollsMy grandma (I called her Baba) made these in her coal oven. How she regulated the temperature is beyond me! She always made extra rolls for the neighbors to bake in their own ovens. My mom and aunts would deliver the formed rolls at lunchtime. —Charlotte Hendershot, Hudson, Pennsylvania
Cornmeal Pan RollsThese delightful golden rolls are always requested at Thanksgiving and Christmas. The recipe is one we’ve enjoyed for years. —Vivian Eccles, Gridley, Kansas
English Batter BunsSince receiving this easy-to-prepare recipe from a dear friend, I've made these rolls often for the holidays. —Geraldine West, Ogden, Utah
Blue-Ribbon Herb RollsThese rolls have been a favorite of ours for nearly 25 years. I even baked them in an old wood stove when we lived on a farm. I developed the recipe using several techniques I learned while studying the art of bread making. The recipe won a blue ribbon at our county fair. —Mary Ann Evans, Tarpon Springs, Florida
Perfect Dinner RollsThese rolls melt in your mouth. I loved them as a child, and I'm happy to make them for my kids because I know I am creating those same wonderful memories my mom made for me! —Gayleen Grote, Battle View, North Dakota
French Crescent RollsWhenever we have rolls and coffee after church, these come along with me. Here on the high plains, we've been raising cattle, wheat and daughters for 30 years. Our two oldest are grown, and our youngest just began college. —Betty Ann Wolery, Joplin, Montana
Potato Pan RollsMy family loves these rolls and requests them often. They don't take long to make because you use quick-rise yeast. —Connie Storckman, Evanston, Wyoming
No-Knead Knot RollsMy mom, Velma Perkins, loved to serve these light, golden rolls when I was growing up on our Iowa farm. They're extra nice since they require no kneading. The dough rises in the refrigerator overnight, so there's little last-minute fuss to serve fresh hot rolls with any meal. —Toni Hilscher, Omaha, Nebraska
Pumpkin Pan RollsServe these spicy-sweet pumpkin rolls for dinner—or at any time of day–and get ready to hear a chorus of yums in your kitchen! —Linnea Rein, Topeka, Kansas
Oatmeal Dinner RollsThese fluffy rolls go perfectly with any meal. They have a delicious homemade flavor that's irresistible. I like them because they're not hard to make and they bake up nice and high. —Patricia Staudt, Marble Rock, Iowa
Potluck Pan RollsThe appealing homemade yeast-bread flavor of these golden rolls is unbeatable. Soft and light, they're great alongside any entree. Folks are disappointed if I don't bring them to potluck dinners. —Carol Mead, Los Alamos, New Mexico
Pumpkin Knot RollsThese rolls are the lightest, most delicious ones I've ever tasted—and everyone else seems to agree. The pumpkin gives them mild flavor, moist texture and a pretty golden color. At our house, it wouldn't be the holidays without them. —Dianna Shimizu, Issaquah, Washington

 Updated: Feb. 18, 2020