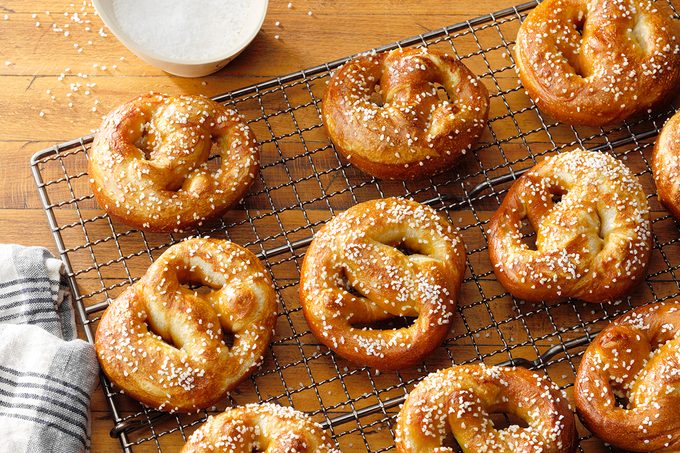
This soft, chewy snack is a staple at German beer halls and breweries, but why make the trip when it's this easy to learn how to make soft pretzels at home?
Our editors and experts handpick every product we feature. We may earn a commission from your purchases.
ⓘ
Whether you’re enjoying a pilsner at your favorite beer garden, taking in a baseball game at the stadium or catching a flick at the theater, there’s one treat everyone craves: soft pretzels.
Chewy, salty and often paired with a tempting dip (hello, neon yellow nacho cheese), these pretzels always hit the spot. They’re not a treat many of us bake at home—but learning how to make soft pretzels yourself isn’t too challenging. We bet you’ve got all the ingredients and gear already on hand. All you have to do is practice that perfect pretzel twist!
How to Make Soft Pretzels at Home
Taste of Home
When learning how to make soft pretzels at home, you want an ultra craveable recipe. Lucky for us, reader Elvira Martens of Aldergrove, B.C., assures us that her recipe never lasts long in her house. After one bite, you’ll see why.
Although pretzels may look a little complicated, they really don’t require many special tools. If you are looking to pick up some gear to make the process even easier, these are the Taste of Home Test Kitchen’s top picks.
Dough whisk:It might be funny looking, but this OXO Good Grips Dough Whisk is a wonderful tool for stirring bread dough, quick breads, biscuits and more.
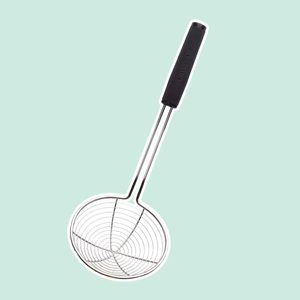
Mesh spider:This wiry strainer is an easy way to fish pretzels out of the baking soda bath. You’ll find plenty of other uses for it, too, such as when frying.
Large baking sheet:Whether you make small soft pretzels or oversized pretzels to share, you’ll need a generously sized sheet to hold them.
Directions
Step 1: Proof the yeast
Taste of Home
Like with any yeasted bread, the first step is to proof the yeast. To activate the yeast, mix a packet with warm water (100º should do it) and a tablespoon of sugar. The small amount of sugar in this recipe isn’t to add sweetness—it’s to feed the yeast. You could use honey or agave syrup if you prefer.
Give the mix a quick stir and let it sit for 5 minutes as you prep other ingredients. The yeast is ready to use when it’s foamy. If you don’t see any change in your mixture, the yeast may be expired or the water may have been too hot. If that happens, start again.
Step 2: Make the pretzel dough
Taste of Home
Next, combine the yeast mixture, salt and two cups of flour. Mix with your dough whisk or stand mixer. Gradually add in more flour until you’ve got a stiff dough.
Test Kitchen Tip: While this recipe calls for all-purpose flour, you can use bread flour instead. The extra gluten in bread flour can help the pretzels hold their shape a bit better.
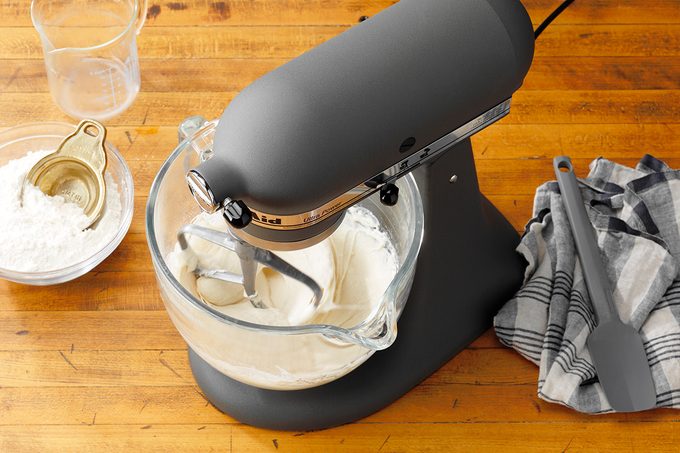
Step 3: Knead the dough
Taste of Home
Next, lightly flour your work surface. Just a sprinkling will do here; adding too much flour will make your dough dry and difficult to work with. While the dough may seem a little messy to start, it will become less sticky as you continue to knead. Kneading helps to hydrate the flour fully (meaning it will absorb some of the water) and helps develop gluten which gives soft pretzels their texture.
If you have a stand mixer, feel free to let the machine do the work. You can knead dough in a stand mixer fitted with a dough hook. Because the machine is pretty darn powerful, you only need to let the mixer run for about 2 minutes to achieve the right consistency. You’ll know the dough is kneaded enough when it starts to pull away from the bowl and creep up the dough hook.
Step 4: Proof
After kneading the dough, it’s time to let it rise. Put the dough in a large greased bowl, being sure to grease the top of the dough as well. Cover the bowl with a tea towel and let it rise in a warm spot in your kitchen until it doubles in size. This will take about an hour.
If the temps in your home are too cool (yeasted dough proofs best in warm weather, above 75º), you can invest in one of these nifty dough rising mats or you can convert your oven into a proofing chamber. To do this, just pop your bowl of bread dough into the oven—the oven should be off!— along with a pan full of simmering water. Let the heat and steam do their work and you’ll find your bread will double in about an hour.
Step 5: Divide the dough
Taste of Home
When the pretzel dough has doubled in size, punch it down and turn it onto a clean work surface. From there, divide the dough into 12 equal portions.
You can do this all by eye—divide the dough into quarters and then each quarter into thirds. You can also use a kitchen scale. Just weigh the dough and divide the weight by 12. Once portioned, roll each section into a ball.
If you want to make oversized pretzels to share for a party, divide the dough into four.
Step 6: Roll into ropes and shape
Taste of Home
Now for the twisted part of this process! Start by rolling each ball into a 22-inch rope (or 40 inches if you’re making oversized pretzels). That’s where your kitchen ruler comes in handy.
To make the pretzel shape, take each end of the rope and make a U-shape. Cross one end over the other, twist, and bring the twisted ends to the bottom of the U. Press the ends lightly into the dough to secure them in place. If they won’t stick, use a dab of water.
If you can’t picture those movements, watch our video (above) to see the technique in action! Your first pretzel might not be the prettiest, you’ll get the hang of it after one or two.
Test Kitchen Tip: To try out different pretzel shapes, use your bench scraper to cut the rope into small pieces for pretzel nuggets or slightly longer lengths for pretzel rods.
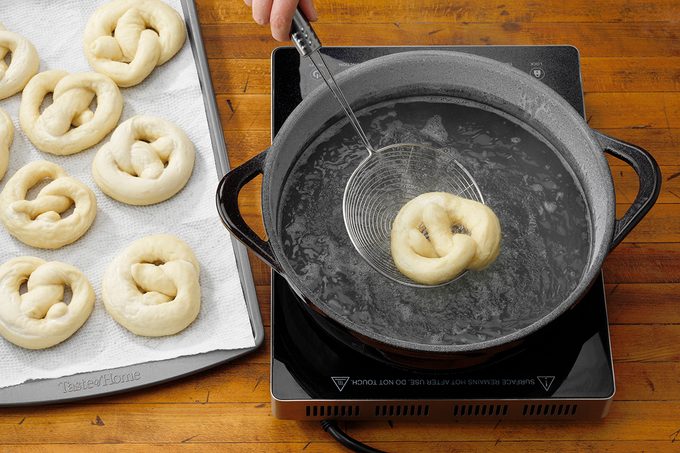
Step 7: Boil in a baking soda bath
Taste of Home
Now comes the step that gives the pretzels their signature color: the alkali bath. Traditionally, food-safe lye was used for this step, but it’s much simpler to swap out the lye for baking soda (though you can still use lye if you want to go the strictly authentic route). This step provides the pretzels with their classic mahogany color and also gives them that chewy texture. Don’t skip this step!
To create the bath, bring water and baking soda to a boil in a large pot. Using the wire spider, carefully place each pretzel into the bubbling water and let it sit for 30 seconds. Once boiled, lift the pretzel out and let it drain on paper towels that have been lightly spritzed with cooking spray.
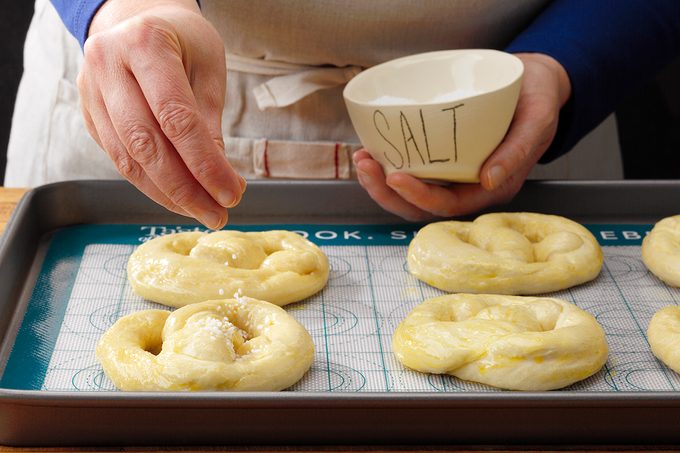
Step 8: Top and bake
Taste of Home
After all the pretzels are boiled, move them to a baking sheet that’s been greased with cooking spray or lined with a silicone mat. Don’t use parchment paper; the pretzels will stick to it. Brush each pretzel with an egg wash, then top with pretzel salt or coarse salt.
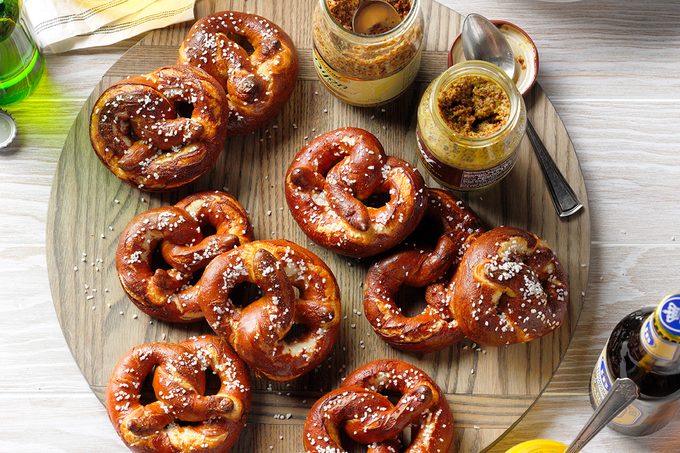
Bake the pretzels at 425º for 12 to 14 minutes. Let the pretzels cool slightly and then enjoy!
The Best Ways to Eat Soft Pretzels: Dips and Toppings
Taste of Home
To serve soft pretzels, be sure to have plenty of dips at the ready. These are some of our favorites:
Obatzda:This traditional German cheese dip is made with cream cheese, Camembert, onion and a hint of caraway. It’s a must with homemade pretzels—along with these German beers.
Mustard dip: Pretzels and mustard go together like peanut butter and jelly. This dip gets a bit of a kick thanks to spicy horseradish.
Bacon dip: Level up your basic mustard dip with this super-simple dip made with bacon crumbles.
Orange marmalade: It may sound odd, but marmalade and pretzels are a great sweet-salty pairing.
You can also try different toppings on your pretzels.
Everything bagel seasoning: In addition to pretzel salt, shake on a bit of everything bagel seasoning before the pretzels go into the oven. The blend of garlic, sesame seeds and onion is perfect for pretzels and goes well with savory dips.
Garlic and chives: While warm, brush the pretzels with melted butter and shake on a bit of garlic powder and chopped fresh chives from your herb garden. This is a combo that always satisfies.
Cinnamon-sugar: Skip the salt going into the oven. When your pretzels are warm, brush them with melted butter and sprinkle with plenty of cinnamon and sugar.
How to Store Soft Pretzels
As soon as the soft pretzels come out of the oven, they are ready to enjoy. In fact, the sooner you eat these pretzels the better. They are one of those bakes—like doughnuts and bagels—that taste best on the first day. Though if you seal them up in an airtight container, you can try this stale bread trick and revive the pretzels the next day.
Potato pancakes, or latkes, are really versatile. Crispy on the outside and tender on the inside, they can be a side dish for just about any meal or the main course for a light meal. We have them often at our house. —Lydia Robotewskyj, Franklin, Wisconsin
Oma's Apfelkuchen (Grandma's Apple Cake)My husband’s German family calls this Oma’s apfelkuchen, which translates to "Grandma’s apple cake." They’ve been sharing the recipe for more than 150 years. I use Granny Smith apples, but any variety works. —Amy Kirchen, Loveland, Ohio
German Potato DumplingsPotato dumplings (called Kartoffel Kloesse in Germany) are a delightful addition to any German feast. The browned butter sauce is delectable.—Arline Hofland, Deer Lodge, Montana
Authentic German Potato SaladThis authentic German potato salad recipe came from Speck’s Restaurant, which was a famous eating establishment in St. Louis from the 1920s through the ‘50s. I ate lunch there almost every day and always ordered the potato salad. When the owner learned I was getting married, he gave me the recipe as a wedding gift! —Violette Klevorn, Washington, Missouri
Bavarian Pot RoastSince all my grandparents were German, it's no wonder that so many Bavarian recipes have been handed down to me. Because the Midwest has such a large German population, I feel this recipe represents the area well. —Susan Robertson, Hamilton, Ohio
Oktoberfest Red CabbageFour generations of our family have made this dish of red cabbage and apples, known as rotkohl ("red cabbage"). We love the tart and sweet flavors. —Diana Likes, Chandler, Arizona
Almond-Filled StollenI’ve been making this during the holiday season for nearly 50 years. When we flew to Alaska one year to spend Christmas with our daughter’s family, I carried my stollen on the plane!—Rachel Seel, Abbotsford, British Columbia. If you like this, you must try these German Christmas dinner recipes.
Spicy Bavarian Beer MustardHere's a gift that has bite! This spicy beer mustard is great with pretzels or as a condiment for bratwurst. —Taste of Home Test Kitchen
Apple & Spice Pork TenderloinMy family loves pork tenderloin, so I created this hearty meal. The slightly sweet dish is one of our favorites. It's also an impressive dish for company.—Joyce Moynihan, Lakeville, Minnesota.
Slow-Cooked Sauerkraut SoupWe live in Lancaster County, which has a rich heritage of German culture. Our dishes often include sauerkraut, potatoes and sausage. We enjoy this recipe on cold winter evenings, along with muffins and fruit. —Linda Lohr, Lititz, Pennsylvania
Raspberry Custard KuchenBack where I grew up in Wisconsin, people have been baking this German treat for generations. We love it for breakfast or as a special dessert. It's no fuss to fix and impressive to serve. —Virginia Arndt, Sequim, Washington
Tangy Bacon Green BeansMy grandmother’s Pennsylvania Dutch-style recipe turns plain old green beans into a tangy cross between three-bean and German potato salads. —Sharon Tipton, Casselberry, Florida
Cranberry ConserveI'm 95, and I still remember my grandmother from Germany making this lovely, delicious conserve for the holidays. She'd give it to family members and friends. It tastes great served as a relish alongside meat or even spread on biscuits.
-Mildred Marsh Banker, Austin, Texas
Potato Kielbasa SkilletNo need to hunt through kielbasa and potato recipes, this smoky take steals the show as a hearty home-style, all-in-one meal. It's especially perfect on those cold late fall and early winter nights. —Taste of Home Test Kitchen, Milwaukee, Wisconsin
German PancakePiping hot and puffy from the oven, this golden pancake made a pretty presentation for a skier's theme breakfast I hosted. Served with homemade buttermilk syrup, it's an eye-opening treat. Make several German pancakes if you're feeding a crowd, and keep in mind that my easy syrup tastes great on waffles and French toast, too. —Renae Moncur, Burley, Idaho
Mulled WineThis mulled wine is soothing and satisfying with a delightful blend of spices warmed to perfection. Refrigerating the wine mixture overnight allows the flavors to blend, so don't omit this essential step. —Taste of Home Test Kitchen, Milwaukee, Wisconsin
Slow-Cooker German Potato SaladHere's the dish everyone looks for at our parties, so we always double the recipe. It was handed down from my mother-in-law and has been a family favorite for years. —Stacy Novak, Stafford, Virginia
Contest-Winning Bavarian Meatball HoagiesWhen my husband is not manning the grill, I count on my slow cooker. These meatballs are a guaranteed crowd-pleaser when I serve them as a party appetizer or spooned over crusty rolls and topped with cheese for irresistible sandwiches. —Peggy Rios, Mechanicsville, Virginia
Pork Schnitzel with Dill SauceSchnitzel is one of my husband’s favorites because it reminds him of his German roots. An appealing dish for guests, it’s ready in a jiffy. Pop it on buns for a fun handheld option. —Joyce Folker, Paraowan, Utah
Pronto Potato PancakesPancake lovers know these fluffy delights are not just for breakfast. Try serving these savory ones as a side dish with any main, or enjoy them solo topped with some homemade applesauce. They will not disappoint. —Darlene Brenden, Salem, Oregon
Oktoberfest StrudelsMy husband, being born and raised in Wisconsin, loves bratwurst sausages. So I tweaked this strudel recipe to include some of his favorite filling ingredients and it was an instant hit. Serve with extra mustard for dipping. —Cleo Gonske, Redding, California
LebkuchenIt's tradition for my family to make these German treats together. The recipe came from my great-grandmother's cookbook, and judging from the amount of requests I get, it has certainly stood the test of time. —Esther Kempker, Jefferson City, Missouri
German Beer Cheese SpreadWe love recipes inspired by our German heritage. This tangy spread is fantastic served alongside everything, including pretzels and pumpernickel or crackers and sausage. Choose your favorite beer—the flavor really comes through. —Angela Spengler, Tampa, Florida
German Plum TartThe buttery crust of this fruit-filled treat melts in your mouth. You can substitute sliced apples or peaches for the plums with great results. I've used this crust with blueberries, too. —Helga Schlape, Florham Park, New Jersey
Potluck German Potato SaladThis is a big hit at church potlucks. One man says he comes only so that he can eat my potato salad! —Kathleen Rabe, Kiel, Wisconsin
Pfeffernuesse CookiesA German holiday tradition, these fragrant pfeffernuesse cookies pack a warm rush of spices in every bite. Also called peppernuts, they go wonderfully with coffee or tea.—Joanne Nelson, East Stroudsburg, Pennsylvania
Slow-Cooked Reuben BratsSauerkraut gives these beer-simmered brats a big flavor boost, but it’s the special chili sauce and melted cheese that put them over the top. Top your favorite burger with some of the chili sauce; you won't be sorry. —Alana Simmons, Johnstown, Pennsylvania
Pickled BeetsThe pickled beets my mother made came from our garden and were canned for the winter months. Even as a child I loved beets because they brought so much color to our table. —Sara Lindler, Irmo, South Carolina
Easy Potato RollsAfter I discovered this recipe, it became a mainstay for me. I make the dough ahead of time when company is coming, and I try to keep some in the refrigerator to bake for our ranch hands. Leftover mashed potatoes are almost sure to go into these rolls. —Jeanette McKinney, Belleview, Missouri
Bratwurst SupperAfter trying a few bratwurst recipes, I've found this meal-in-one is ideal for camping since it grills to perfection in a heavy-duty foil bag. Loaded with chunks of bratwurst, red potatoes, mushrooms and carrots, it's easy to season with onion soup mix and a little soy sauce. —Janice Meyer, Medford, Wisconsin
German Apple StrudelThis gorgeous strudel has just what you crave this time of year: thin layers of flaky crust and lots of juicy apples. —Darlene Brenden, Salem, Oregon
Dijon Grilled Pork ChopsMy mom gave me the recipe for these savory chops with a sweet and tangy marinade. The apple juice and Dijon mustard complement the pork nicely. With a vegetable and some rice or pasta, you have a meal. —Babette Watterson, Atglen, Pennsylvania
Caraway Seed Rye BreadMy parents were immigrants from Czechoslovakia and my mother would pull out this rye bread recipe when guests came over for dinner. Every time I bake it, I get nostalgic for those days. —Millie Feather, Baroda, Michigan
Ham & Potato Salad SandwichesThese little sandwiches with zingy toppings are super simple to pull together. This classic version originated in a deli in Prague, where they're a really popular winter party food. —Cara McDonald, Winter Park, Colorado
Garlic-Dill Deviled EggsIn my family, Easter isn't complete without deviled eggs. Fresh dill and garlic perk up the flavor of these irresistible appetizers that you'll want to eat on every occasion. —Kami Horch, Calais, Maine
Pressure-Cooker Cheddar Bacon Ale DipMy tangy, smoky dip won the top prize at our office party recipe contest. Use whatever beer you like, but steer clear of dark varieties. —Ashley Lecker, Green Bay, Wisconsin
Almond Spritz CookiesThis almond spritz cookies recipe can be left plain or decorated with colored sugar and frosting. In our house, it just wouldn't be Christmas without some cookie press recipes.—Tanya Hart, Muncie, Indiana
Slow-Cooker SauerbratenMy family is of German Lutheran descent, and although we enjoy this traditional beef roast, I never liked the amount of time and fuss it takes to make it. This recipe is so good and oh-so-easy. It's great served with dumplings, spaetzle, veggies or a salad. —Norma English, Baden, Pennsylvania
Chocolate LebkuchenHaving lived in Germany, I try to keep my German cooking as authentic as possible. This lovely lebkuchen recipe is a culinary Christmas custom. —Cathy Lemmon, Quinlan, Texas
Apple-Roasted Pork with Cherry Balsamic GlazeI added roasted apples, cherries and onions to turn ordinary pork into an impressive dish. There is a short time span between caramelized onions and burned ones, so pay close attention once they start cooking. —Josh Downey, McHenry, Illinois
Sausage Lentil SoupI first tasted this wonderful soup at a friend's house. Now it's my favorite, especially on a cool, crisp night. —Catherine Rowe, Berthoud, Colorado
Rustic Caramel Apple TartLike an apple pie without the pan, this scrumptious tart has a crispy crust that cuts nicely and a yummy caramel topping. —Betty Fulks, Onia, Arkansas
Standing Rib RoastThis standing rib roast recipe is practically foolproof. Treat your family to tender slices of standing rib roast or use the seasoning blend on a different beef roast for a hearty, delicious main dish. I love to prepare this recipe for special occasions. —Lucy Meyring, Walden, Colorado
Rich Fruit KuchensThis German classic is such a part of our reunions, we designate a special place to serve it. Five generations flock to the "Kuchen Room" for this coffee cake. —Stephanie Schentzel, Northville, South Dakota
Lisa is a former Taste of Home editor and passionate baker. During her tenure, she poured her love of all things sweet (and sometimes savory) into Bakeable, Taste of Home's baking club. Lisa also dedicated her career here to finding and testing the best ingredients, kitchen gear and home products for our Test Kitchen-Preferred program. At home, you'll find her working on embroidery and other crafts.
We are no longer supporting IE (Internet Explorer) as we strive to provide site experiences for browsers that support new web standards and security practices.
 Updated: Nov. 04, 2022